In this article, we will explain the main functions of the control software Wellprint, and we won't cover those that are used during calibration.
Basic Control Functions
- Let's look at the first column, which contains some basic functions.

- Open: Import the PRN file that has been processed by the RIP software, we can also click the file manager in Task Choice to browse for files.
- Print: After importing the PRN file, select the file and click Print to initiate printing for the current task.
- Pause: During printing, pause the process. The button will change to Continue. Click Continue and printing will go on.
- Stop: Stop the current print task.
- Flash: Turn on or off the head standby flash, usually we we leave this off.
- Clean: When the head is not in good condition, clean it. There are two modes, normal and strong, usually we use normal mode and select two heads.
- Test: Head status and vertical calibration. We use head status and the printer will print a test pattern by which we can tell if the print heads are in good status, if not, we can clean. Vertical calibration is used during calibration.

print head status: good

print head status: not ideal
- Home: When the carriage is not at the cap station, right-click this button and the carriage will go back to the cap station.
- Left: The carriage will move to the left
- Right: The cartridge will move to the right
- Feed: The flatbed will move forward
- Back: The material will move backward
Task Properties
Now we double-click a PRN file to load it as a task, now we can see Task Properties. 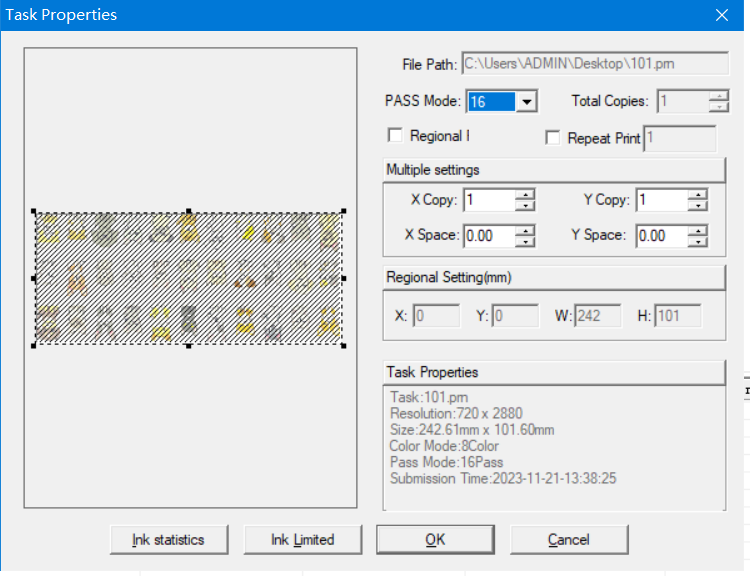
- Pass mode, we don't change it.
- Rigional. If we select it, we can change the size of the print. We don't usually use this function as most of the changes related to size are done in PhotoShop and the RIP software.
- Repeat print. For example, if we input 2, the same PRN task will be printed again at the same position after the first print is done.
- Multiple settings. Inputting 3 will print three identical images along the printer flatbed's X-axis. Inputting 3 in both fields prints 9 total identical images. X space and Y space, the space here means the distance between the edge of one picture to the edge of the next picture.
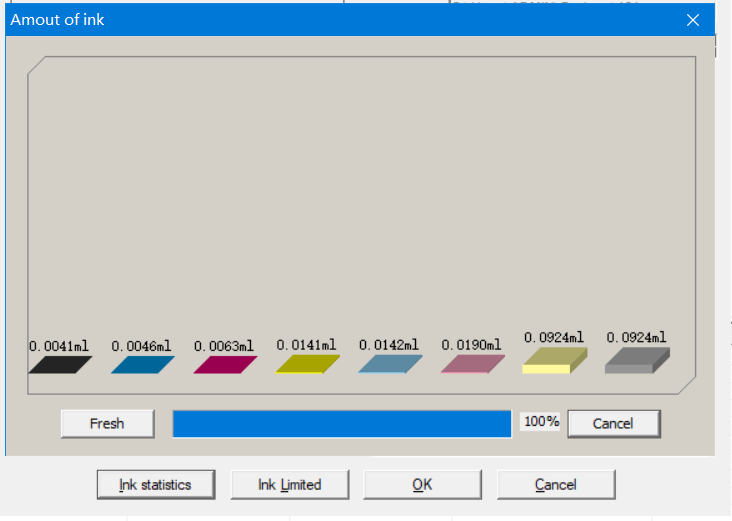
- Ink statistics. Displays estimated ink usage for the print. The second ink pillar(count from the right side) represents white and the first one represents varnish, so we can also check whether we have the white or varnish spot channel.
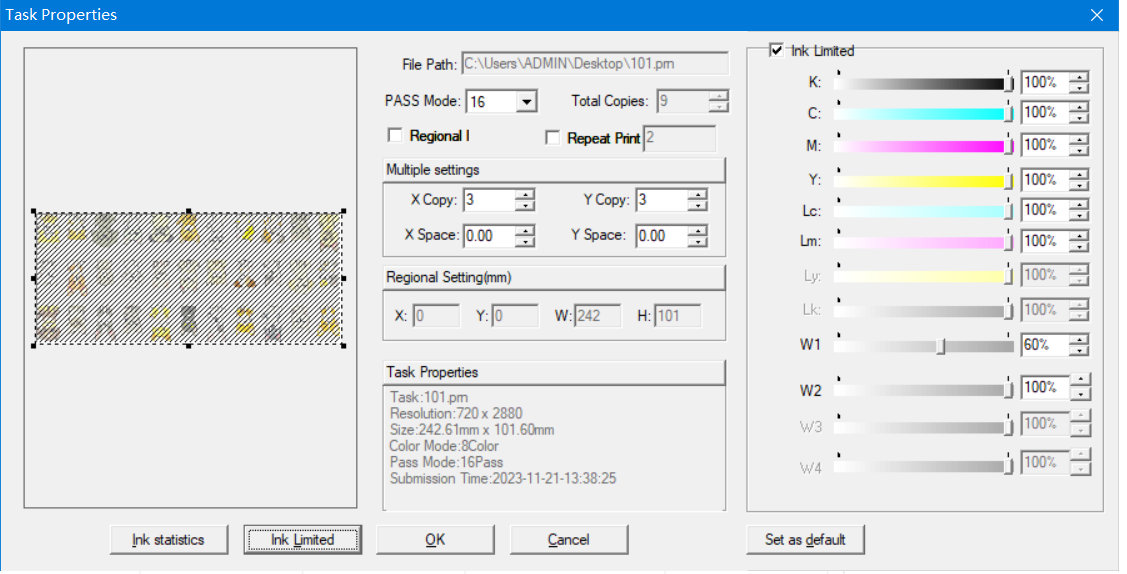
- Ink limited. Here we can adjust the ink volume of the current PRN file. When the ink volume is changed, the output image resolution will decrease and the ink dot will become thicker. We usually don't change it but if we do, click "set as default".
 Click OK at the bottom and the task import will be completed.
Print Control
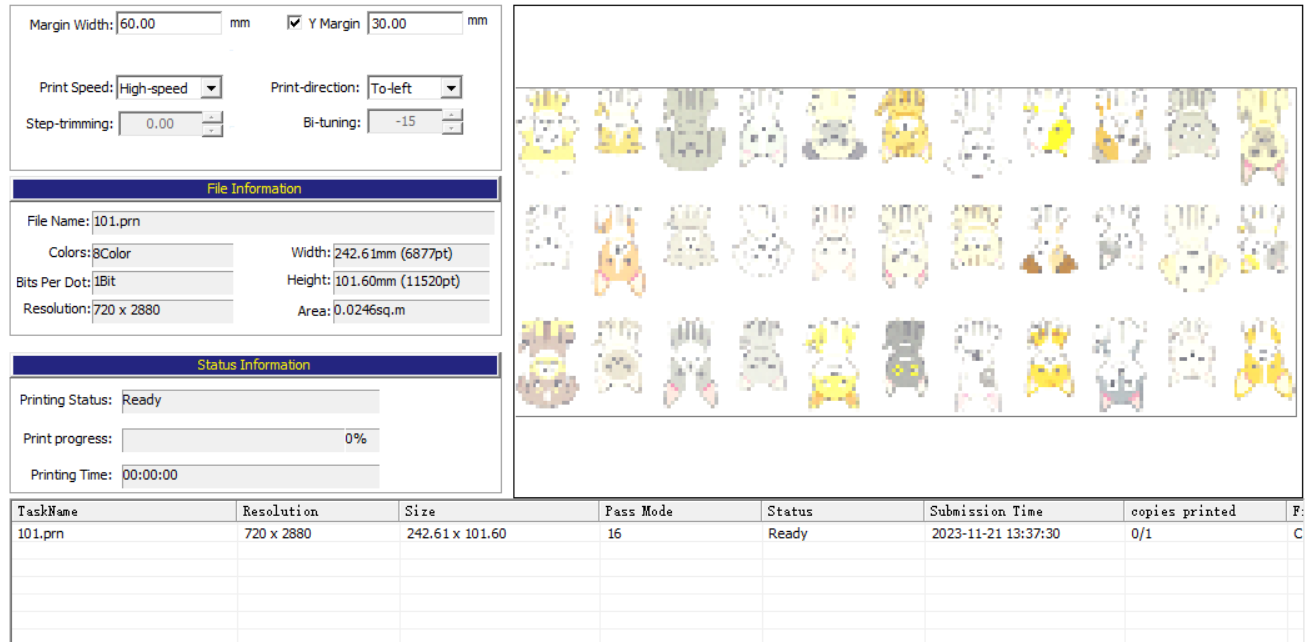
- Margin Width and Y Margin. This is the coordinate of the print. Here we need to understand a concept, which is the X-axis and Y-axis. The X-axis goes from the right side of the platform to the left, from 0 to the end of the platform which could be 40cm, 50cm, 60cm, or more, depending on the model you have. The Y axis goes from front to end. Note, this is in millimeter, not inch. If we uncheck this Y margin box, the flatbed will not move forward and backward to locate the position when it prints the picture. Usually, we will uncheck the Y margin box when we print the head status.
- Print speed. High speed, we don't change it.
- Print direction. Use "To-Left", not "To-Right". To-left prints only as the carriage moves left, not on the return. Bi-directional prints both directions, faster but at a lower resolution.
- Print progress. Displays current print progress.
Parameter
- White ink setting. Type. Select Spot and we don't change it. There are five options here. Print all means it'll print color white and varnish. The light here means varnish. Color plus white(has light) means it will print color and white even if the picture has color white and varnish(it's ok not to have a varnish spot channel in the file). The same goes for the rest options. Color plus light(has light) means it will print color and varnish even if the picture has color white and varnish. If we select print all, and the file has color and white only, no varnish, the printer will still perform the task of printing varnish without actually applying it. With 2 print heads, this results in a blank second pass.
- White ink channel counts and Oil ink channel counts. These are fixed and should not be changed.
- white ink repeat time. If we increase the figure, the printer will print more layers of white ink, and you will get a thicker print.
- White ink back. Check this box, the printer will print color first, then white. It's used when we do reverse printing on transparent materials such as acrylic, glass, etc.
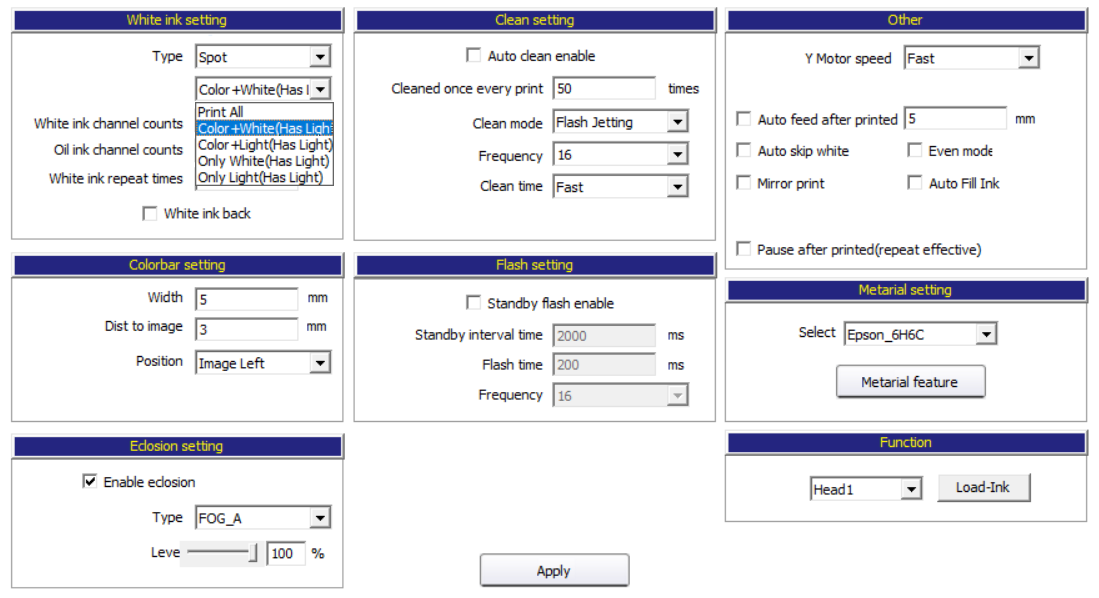
- Clean setting. We don't use it.
- other. auto-feed after printing. If we input 30 here, The printer flatbed will go 30 mm forward after printing.
- auto skip white. Check this box, the printer will skip the blank part of the picture, which can save some time.
- mirror print. This means it will flip the picture horizontally in order to make characters and letters look right. This is also used when we do reverse print, especially important for reverse prints with text.
- Eclosion setting. Similar to Photoshop, this smoothens color transitions to reduce banding at the cost of some clarity. We can adjust the level - FOG is normal, and FOG A is enhanced.
After changing parameters, click Apply for the changes to take effect.
Maintenance
Most of these functions are used during installation and calibration, and we will only cover two parts.
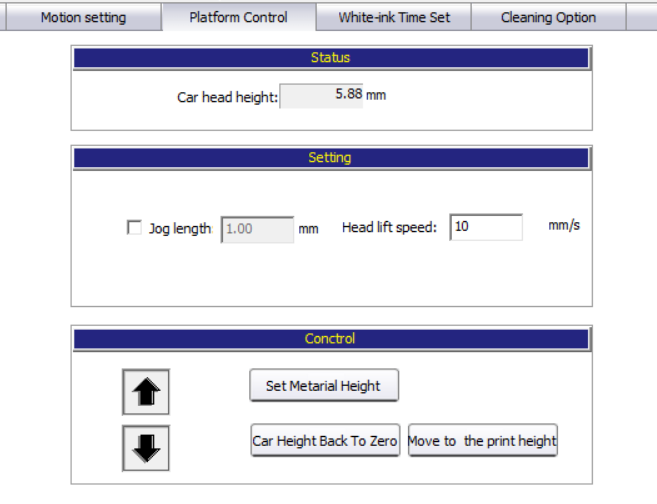
- Platform control, Adjusts printer Z-axis movement. Clicking Up raises the beam and carriage. It will not exceed the limit of the print height, and it won't go lower than the flatbed. Set material height. If we have the height figure of the object, for example, 30mm, add it by 2-3mm, input 33mm in the jog length, and click "Set material height". This isn't commonly used.
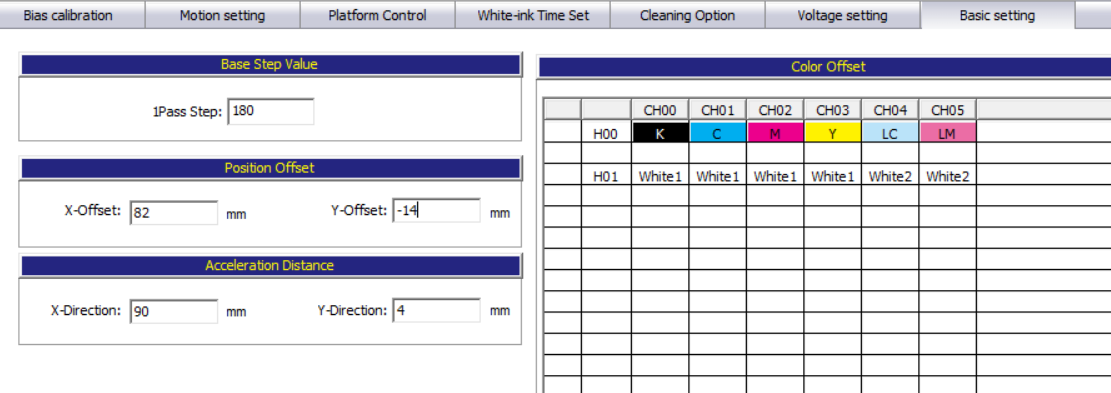
- Basic setting. x offset and y offset. If we input (0,0) in the margin width and Y margin and the print is made at (30mm, 30mm), then, we can minus 30 in both x offset and Y offset, then the print will be made at (0,0) which is the original point.
 Alright, this is the description of the printer control software Wellprint, I hope it's clear to you, and if you have any other questions please don't hesitate to contact our service manager and technician. This description may not apply to all Wellprint software users, just for a reference for Rainbow Inkjet users. For further information, welcome to visit our website rainbow-inkjet.com.
Post time: Nov-22-2023